Miscellaneous Odds and Ends
|
Seat Belt Bracket Attachment PointsLap Belts in a T series MG are a questionable safety measure in the first place. In an accident they are sure to hold hips in place but they may cause your head to to hit the steering wheel or windscreen, and your passenger's head to hit the wiper motor, windscreen or the dash. Three Point, or over-the-shoulder, belts might be better in a minor crash but most solutions I've seen for that arrangement adversely affect the shelf space and lend themselves more to racing cars than street cars. Also any modifications must include easy access to the battery. |
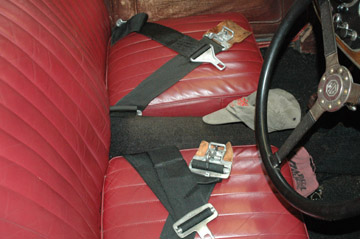
Another major question to ask yourself becomes; is it safer to be ejected from an overturning car than to be attached if you flip over? Good if you have a roll bar but how many of us do? So everyone has to answer that for themselves. I'm not convinced they are a good thing but did install a pair of lap belts. I bolted eyes to the triangular bit of metal at the outside rear of each seat where a bolt had been used to attach the floor board to the chassis. The other eyes go through the drive shaft tunnel and the bracket bolting it to the chassis. Hole sizes had to be increased for the larger eye-bolts and all have large washers between the chassis and the nut. 3 Point/Over the Shoulder Seatbelt Attachment Points Tony Goodall has installed over-the-shoulder belts in his TC which could be adapted to the TA. Again, the disadvantage is that the TA battery must be easily accessible under the 'shelf' and the rear attaching point might require reengineering the shelf. See his photos here. |
Master CylindersWhile a TC master cylinder can be used on a TA, the original TA MC is much preferred because of its canister's height. The cylinder lengths for both are the same (7/8 in. I.D.) and they both have the same threading for the tail piece and the large mounting nut at the rear. However the tail pieces themselves are different. And if you’re using a TC master cylinder you will need to use a tail piece specific to the TA.
Once the cylinder is mounted to the chassis it becomes clear why the TC master cylinder is at a disadvantage. In the photo above, the brown section represents the floor board and the hole in it, through which master cylinder gets topped up. It is harder to see the level of fluid in the TC canister and a funnel is definitely needed when filling. Whereas the level of fluid in the original canister is much easier to see and the opening is easier to 'hit' when pouring from a pint container. |
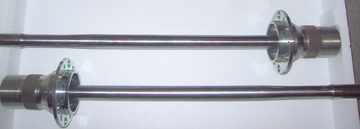
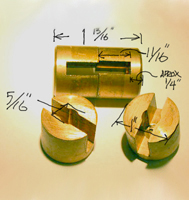
Tapered Axle & HubThe original design for the hub/axle joint was to press fit the two together under thousands of pounds of pressure onto their straight splines. This worked well enough until over time the fit became loose and allowed movement between them. It also allowed oil from the differential to seep into the hub rendering the rear shoes useless. That loose joint between the hub and axle likely contributed to many broken axles.
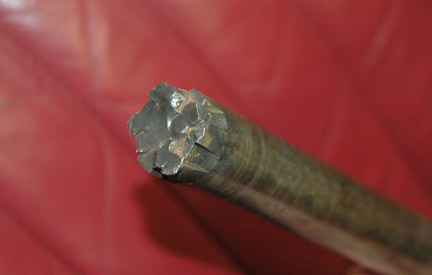
A better design is a tapered joint between the hub and axle with a nut (using 250 lbs of torque) holding them firmly together. Today's tapered axles are much stronger metallurgically than original and the design also eliminates oil entering the hub insuring dry rear brake shoes. No more half shafts like this!
NOT a Tapered Axle! |
Wiper Motor Slow?If your wipers are still working but the action is very slow (I know... ) and/or the unit is very hot to the touch after it has run for a while it could be that the grease in the case has hardened. This can lead to overheating and eventually a burned out armature. You'll need to remove the motor and the cover, clean it out properly and replace the 'bad' grease with white grease. Here's a link to a very good article by Ian Linton on the subject.
Photo by Ian Linton |
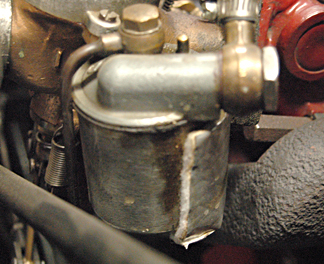
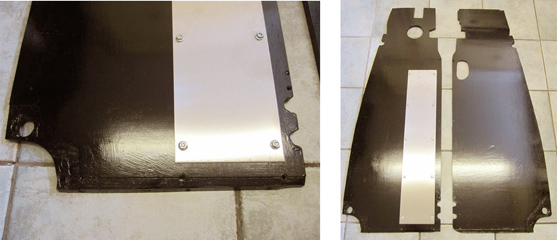
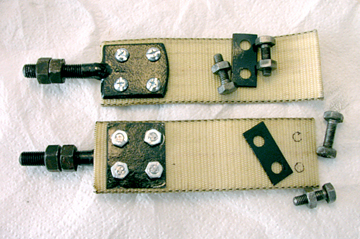
Carburator Float Bowl Heat Shields
|
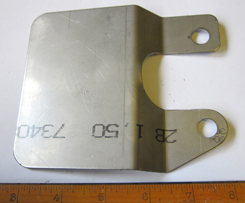
Silencer (Muffler) Heat shieldAnother heat-related idea from Ian, this time directed toward the driver's rear-end. Additionally he adjusted the mountings for the silencer box so it now hangs below rather than above the chassis rails, thus giving an extra 1/4" of air gap (doesn't sound much but it effectively doubled the gap).
|
Engine Restraints/Check Straps
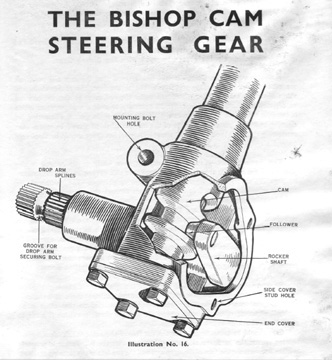
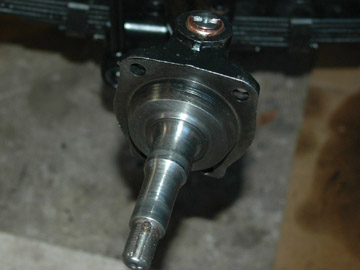
These straps keep the engine from flexing the front plate when the clutch peddle is depressed. They should be in good condition and have a snug fit. The single bolt end attaches to the front engine plate to adjust the tension on the strap. The two bolts attach the strap onto brackets on the tubular cross member under the radiator. Replacements for missing or broken restraints/straps can obtained from Mick Pay (UK) and are often found for sale on ebay. There's more information about these, including a drawing which could be used to fabricate a set, on the Totally T-Type2 website here. Mick also sells Spin-On Oil Filters to fit the late TA engine. Bishop Cam and Other Steering BoxesThe 'Originality Police' often panic when this subject arrises! Some owners of TA, TB and TC have replaced the Bishop Cam steering box with either VW or Datsun boxes often citing either 'Safety' as the reason or that their car was not a pleasure to drive before the change-over. These boxes do resemble the original and are not difficult fit. However some 'adjustment' of the body tub with hacksaw or hammer (or an extra hole drilled into the frame) is sometimes required. If you are a TA owner with a keyed steering wheel (chassis 2881 and earlier) and the steering column of your newly acquired box is splined at the top end then you will need to source a TC type splined steering wheel as well.
Now, if you've rebuilt the BC box and PROPERLY set up the front end and still think your car is 'out of control' and you believe a different box is the solution then by all means replace it. 'Properly set up' should include magnafluxing the rocker shaft and drop arm. If they pass muster, contrary to what some would have you believe, the original BC box is indeed safe. But with that said, it will never be 'easy' to turn the steering wheel at low speeds like the other/modern boxes because of the BC box's high ratio gearing. In this department the other boxes win hands down. In fact, with a BC box one should never try to turn the wheels when the car is at rest. Allow the car to begin to roll before doing so. If you do decide to change it out all would suggest you keep the original steering box, as the next owner just might like to have a go at the original set-up.
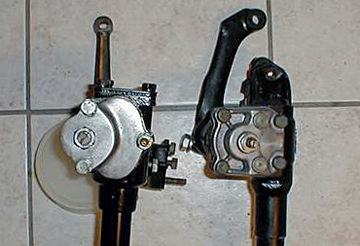
Bishop Cam With Tompkins Kit, Left and VW Steering Box, Right
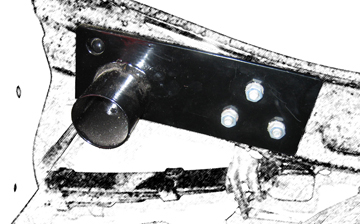
Bracket for attaching a VW steering box to the TA chassis. Using this design no body tub alterations were necessary. |
Steering Knuckle Stub AxlesThe stub axles on the T series have been known to crack and even worse, to snap off. Most of us have done a visual check but that won't show microscopic fractures. Using dyes is one way of seriously checking for cracks and of course, magnafluxing. If in doubt Roger Furneaux (UK) and Bob Grunau (Canada) can supply stubs that exceed the strength of the original materials along with advise how to do this yourself. Or if you wish they can install them into your steering knuckles for you.
|
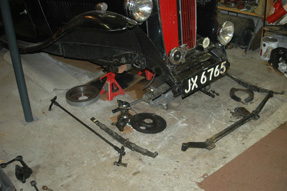
Rebuilding a TA Front End
|
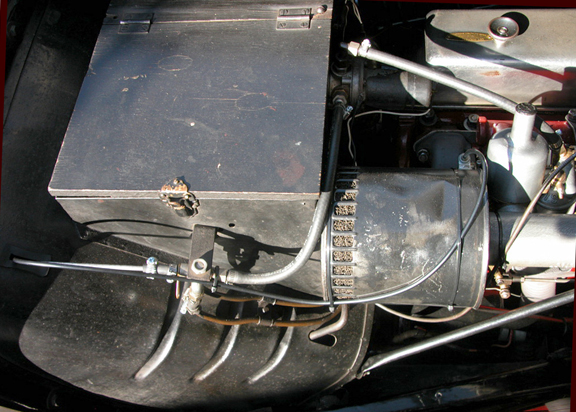
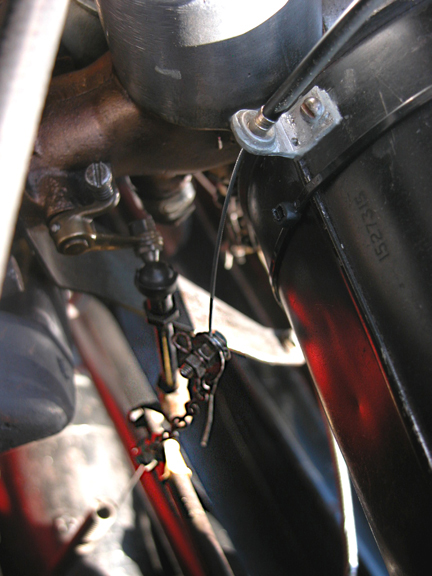
Hand Throttle or Poor Man's Cruise ControlThis hand throttle is a simple Shimano 5 speed bicycle gear shift lever. I disassembled it and found 5 detents for small steel balls which 'lock' it in gear. But not wanting only 5 settings I used a punch and added more dimples. I also discovered that by adjusting the tension inside the mechanism that it would actually stay at any given spot, detent or not. And because the steering column is greater in diameter than a bike's handle bar I needed to make an L shaped bracket to span the difference.
The cable sheath is held to the steering column by a couple of zip-ties. It then circles up and exits the cockpit through the hole used by the Reserve Petrol rod. There are a couple of zip-ties securing it to the Reserve Petcock. Two more zip-ties are used to hold the sheath to the air filter.
The cable sheath terminates at an L shaped bracket that I screwed (and epoxied) to the air filter. The cable continues for 5 or 6 inches where it is clamped and connected to a small chain. At idle, with no pressure on the accelerator linkage, the chain has a small amount of slack. The lower end of the chain is connected to a bracket which wraps around the main accelerator linkage. The brass bracket attached to the accelerator was found in my junk box and may have been a fuel line bracket in a past life. However...... |
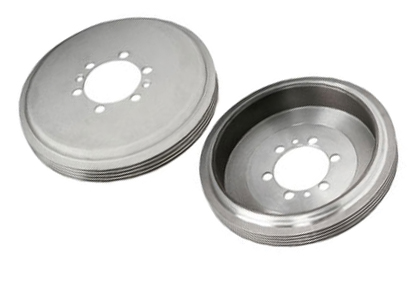
Originally the drums used on our cars was pressed steel but now that Alfins are being reproduced they offer better cooling and give more efficient stopping. A bit on the pricy side but those who have them swear by them. And they look rather nice too. They're available from Moss Europe, Bob Grunau of Canada and others.
|
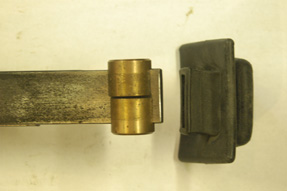
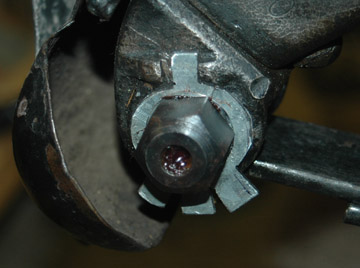
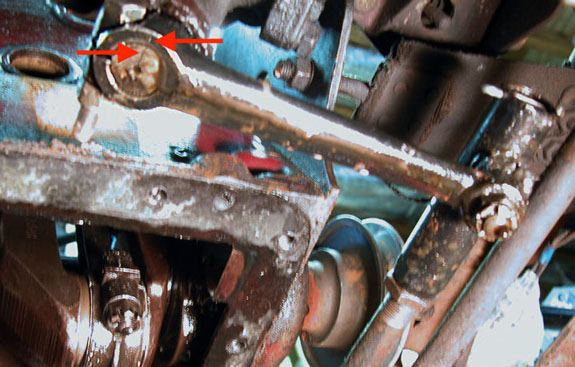
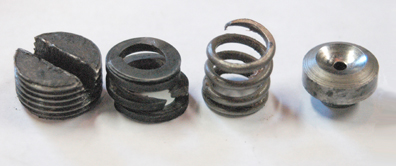
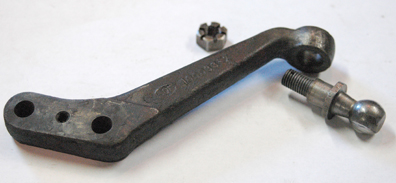
Checking the Springs in the Track Rod Ends At the end of each tie rod and the lower end of the drag link there's a coil spring inside the fittings. Their function is to absorb some of the shock taken from the wheels and transferred to the steering wheel. At rest and under the best of circumstances they're snugged rather tight putting them under constant compression. But given poor maintenance or harsh road conditions they can fail. Because of the way the tie rod ends are made this is not usually disastrous but when spring breakage does happen it degrades the quality of the steering and helps add the 'wandering' common to some TAs. It's essential to check their condition when looking for reasons a car may not be tracking properly. Poor maintenance may also have caused the ball joints to get worn on two sides. Replacement is best but they can also be turned 90 degrees offering 'fresh' sides to the hemispheres.
Note the Worn Area on the Lower Side of the Ball Common practice for adjustment for track rod ends is to tighten the screw in the end with a large screwdriver, compressing the spring, until it is solid then back off one half turn. Secure the end with a split pin. Some have even cut a new slot in the screw end making an X and the adjustment even more precise.
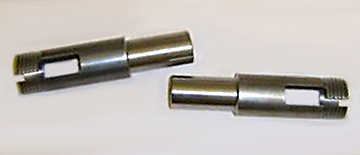
A better solution offered by Bob Grunau of Canada might be to drill two more holes in the casing at 90 degrees from those already existing. Thomas Rendell Curran - Inspector Stride's TA
There aren't that many M.G. TAs used in literature but a few years back I found one. The author and mystery writer, Tom Curran, grew up in St. John's, Newfoundland and gave his character, Inspector Eric Stride of the Newfoundland Constabulary, a TA to drive in his novels. Stride is a bit of an eccentric and is somewhat an outsider with the locals, some of whom question the source of his wealth in a post WWII setting. The author is very candid about a faux pas in one of the books where he has the Inspector remove boots from the boot/trunk of the TA. As he tells it, it was only after seeing one in person did he realize that what he believed was a boot was indeed the fuel tank. Fun! Have a look at his website here then read "About Stride". |
Contents of this Web Site are copyright © 2020
B Davis.